In New York State, there must be an outdoor enclosure for the bird that is large enough for it to bate, or attempt to fly, comfortably and that will protect it from any ground and avian predators, as well as providing some basic protection from the elements.
The indoor facility must:
- measure 8’x8’x8′
- at least one entry system that is protected by a double-door entry system (I’ll explain down the page)
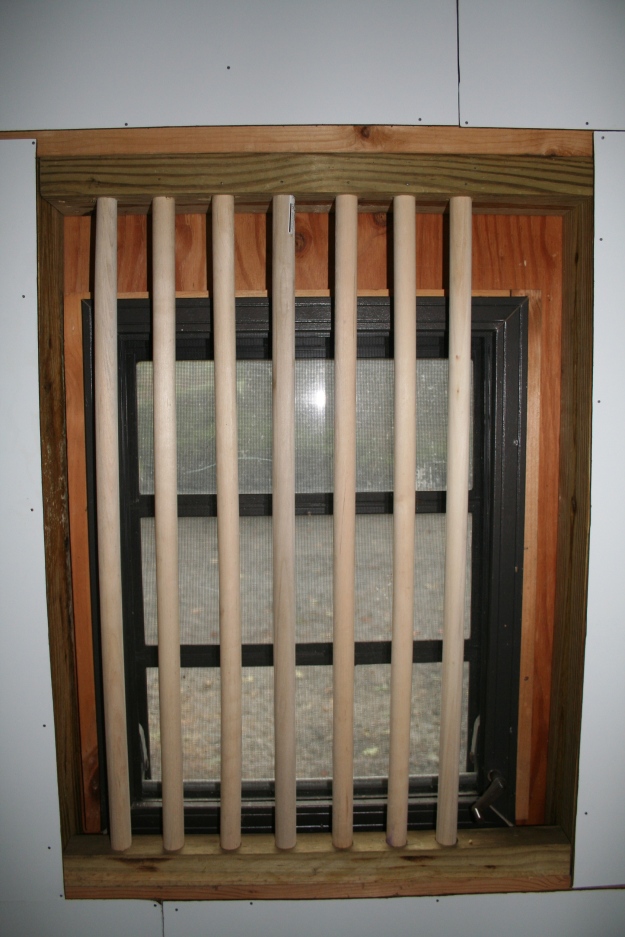
- have at least one window that faces east or south, protected by vertical bars that are spaced narrower than the bird’s body
- An easily cleanable floor
- One perch (unless your bird is to be untethered)
If there are beams running across the roof, or if there are any ledges inside the mews that the bird could perch on, they must be covered up. If the bird sees a place it could perch that is higher than where it is currently tethered, it will try very hard to get up there, since raptors prefer to perch as high as they can. This will stress your bird. If it is to be untethered, then it is more the falconer’s decision whether or not he wants the bird perched there.
The entry system can be a little tricky to figure out. You must have some sort of antechamber to your mews so that you can enter from the outside, close the door behind you, and then open the door that leads to the mews. In the event that your bird is flying free in the mews and, God forbid, you left the door unlatched or something of that sort, it will not be able to escape. I have heard of some fairly simple solutions to this project, as well as overly complicated ones. I found my solution to be stable and reliable without being overly complex. It was a good way for me to build off the pre-existing structure I already had.
I examined the shed and made a list of things I had to do to the shed to make it passable for inspection. It had two windows, but both faced West, and there was only one door. My main obstacles were installing a new window and building an antechamber. I also had to put bars in front of all three windows, cover the walls in something cleanable that would hide any enticing perches from the bird, cover the floor in a cleanable material, and put some kind of shelf or table in the mews to put things on.

This is my solution for the outer door. Using 2″x4″ treated lumber, I built a frame around the two doors into the shed and covered it, including the roof, with 1/2″ galvanized hardware cloth. I then framed the door out of 1″ treated wood and added the spring and gate latch to the front.
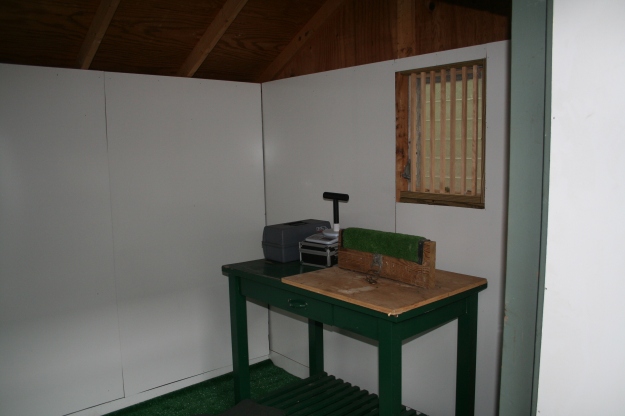
- Taken from the doorway looking in and to the right. I put this table inside the shed as a place to put my perch, scale, and other equipment.
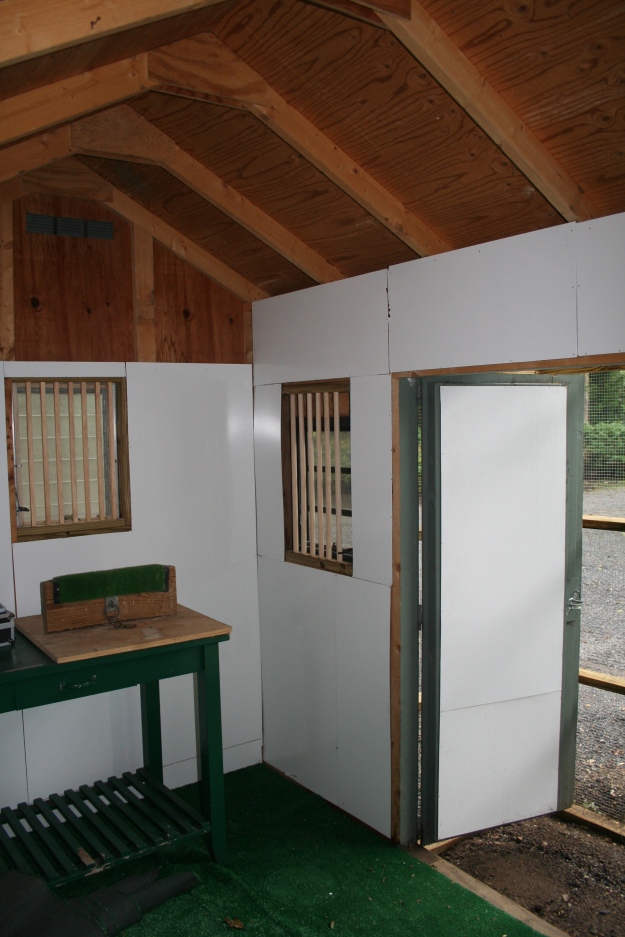
- Pictured is one of the two pre-existing windows, as well as the one I installed that faces south (behind the perch). I covered the walls in white panel board, similar to masonite, that had a plastic coating on either side that would be fairly easy to clean. The floor was originally plywood and I covered it in indoor/outdoor carpet, similar to astro-turf. I was also considering putting a couple coats of floor and porch enamel on the plywood, but eventually decided it was unnecessary.
In addition to the indoor facility, an outdoor facility is required. The weathering station, as it is known, should be large enough for the raptor to comfortably bate without injuring itself on the walls of the enclosure. There must be a perch inside the enclosure and a bath is required inside either the mews or the weathering station; I keep mine in the weathering station. The weathering station should also provide adequate protection from any ground or avian predators. One might think that a Red-tail sized raptor would be safe from any other avian predators, but accipiters are known to attack and kill other raptors.
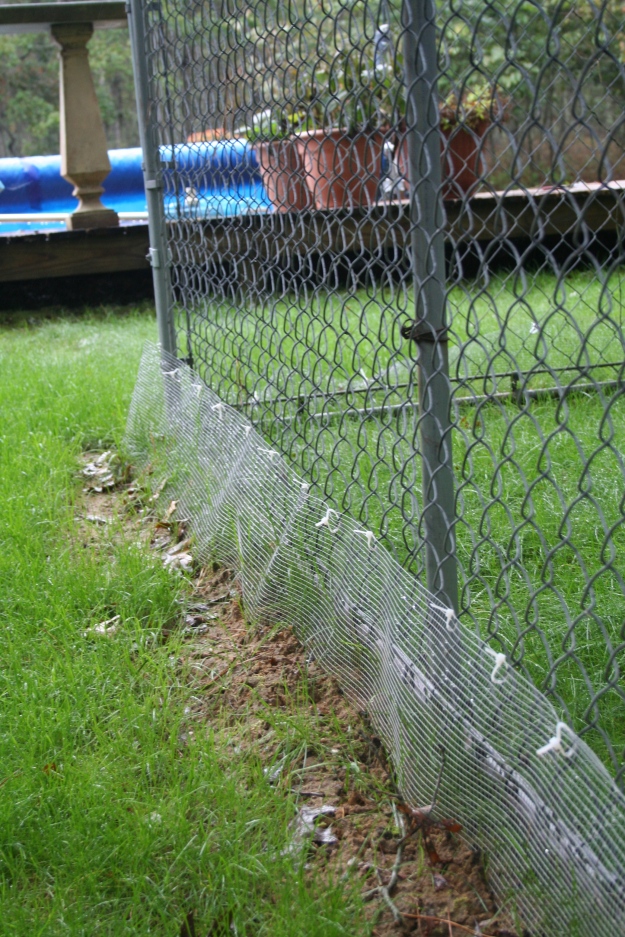
Luckily for me, my sponsor had an old 12’x12′ weathering station, similar to a dog kennel, that he hadn’t used in years. I was able to get the enclosure to my house in four different pieces and assembled them in my yard. I bought a roll of chicken wire 4′ wide and ran it across the top of the enclosure to protect from predators and to stop the hawk from escaping if it becomes untethered. I also dug a trench a little more than 1′ deep and ran 1/2″ galvanized hardware cloth around the perimeter of the enclosure and attached it to the bottom of the enclosure with cable ties to stop foxes or raccoons from digging under the enclosure.


